Thinking in graphs
Thinking about your applications in the context of a monorepo is slightly different than working with a single application repository. When you have multiple workspaces in your repo, you'll want to thinking of your workspaces as associated with each other as a graph of dependencies and tasks.
This is important to stand depending on your role within the monorepo:
Notably, you may only be one of these roles within your monorepo but it is still important to understand the concept of a directed acyclic graph (DAG) as you learn about how to use a monorepo. (We will be calling this simply "a graph" for short as we talk about this idea. No need to get hung up on the fancy words!)
Visualizing a monorepo graph
Creating a mental picture of what a monorepo graph looks like is often a great way to get started with learning (and explaining!) how a monorepo connects workspaces and tasks together. As an example, let's take a look at the repository that holds this application, some starter workspaces, and "Turbo Studio."
First, clone the repository and install its dependencies:
Note: You will need pnpm installed on your machine to run this repository.
Note: You will need pnpm installed on your machine to run this repository.
Next, run the command to build and start "Turbo Studio":
Note: We are using global Turbo here. You can install it with 'npm i -g turbo@latest' or add a script in the root of the repository with this command.
Note: We are using global Turbo here. You can install it with 'npm i -g turbo@latest' or add a script in the root of the repository with this command.
You should see a message that a Next.js app is now running at localhost:3000. When you visit, you'll get a graph that looks similar to this one.
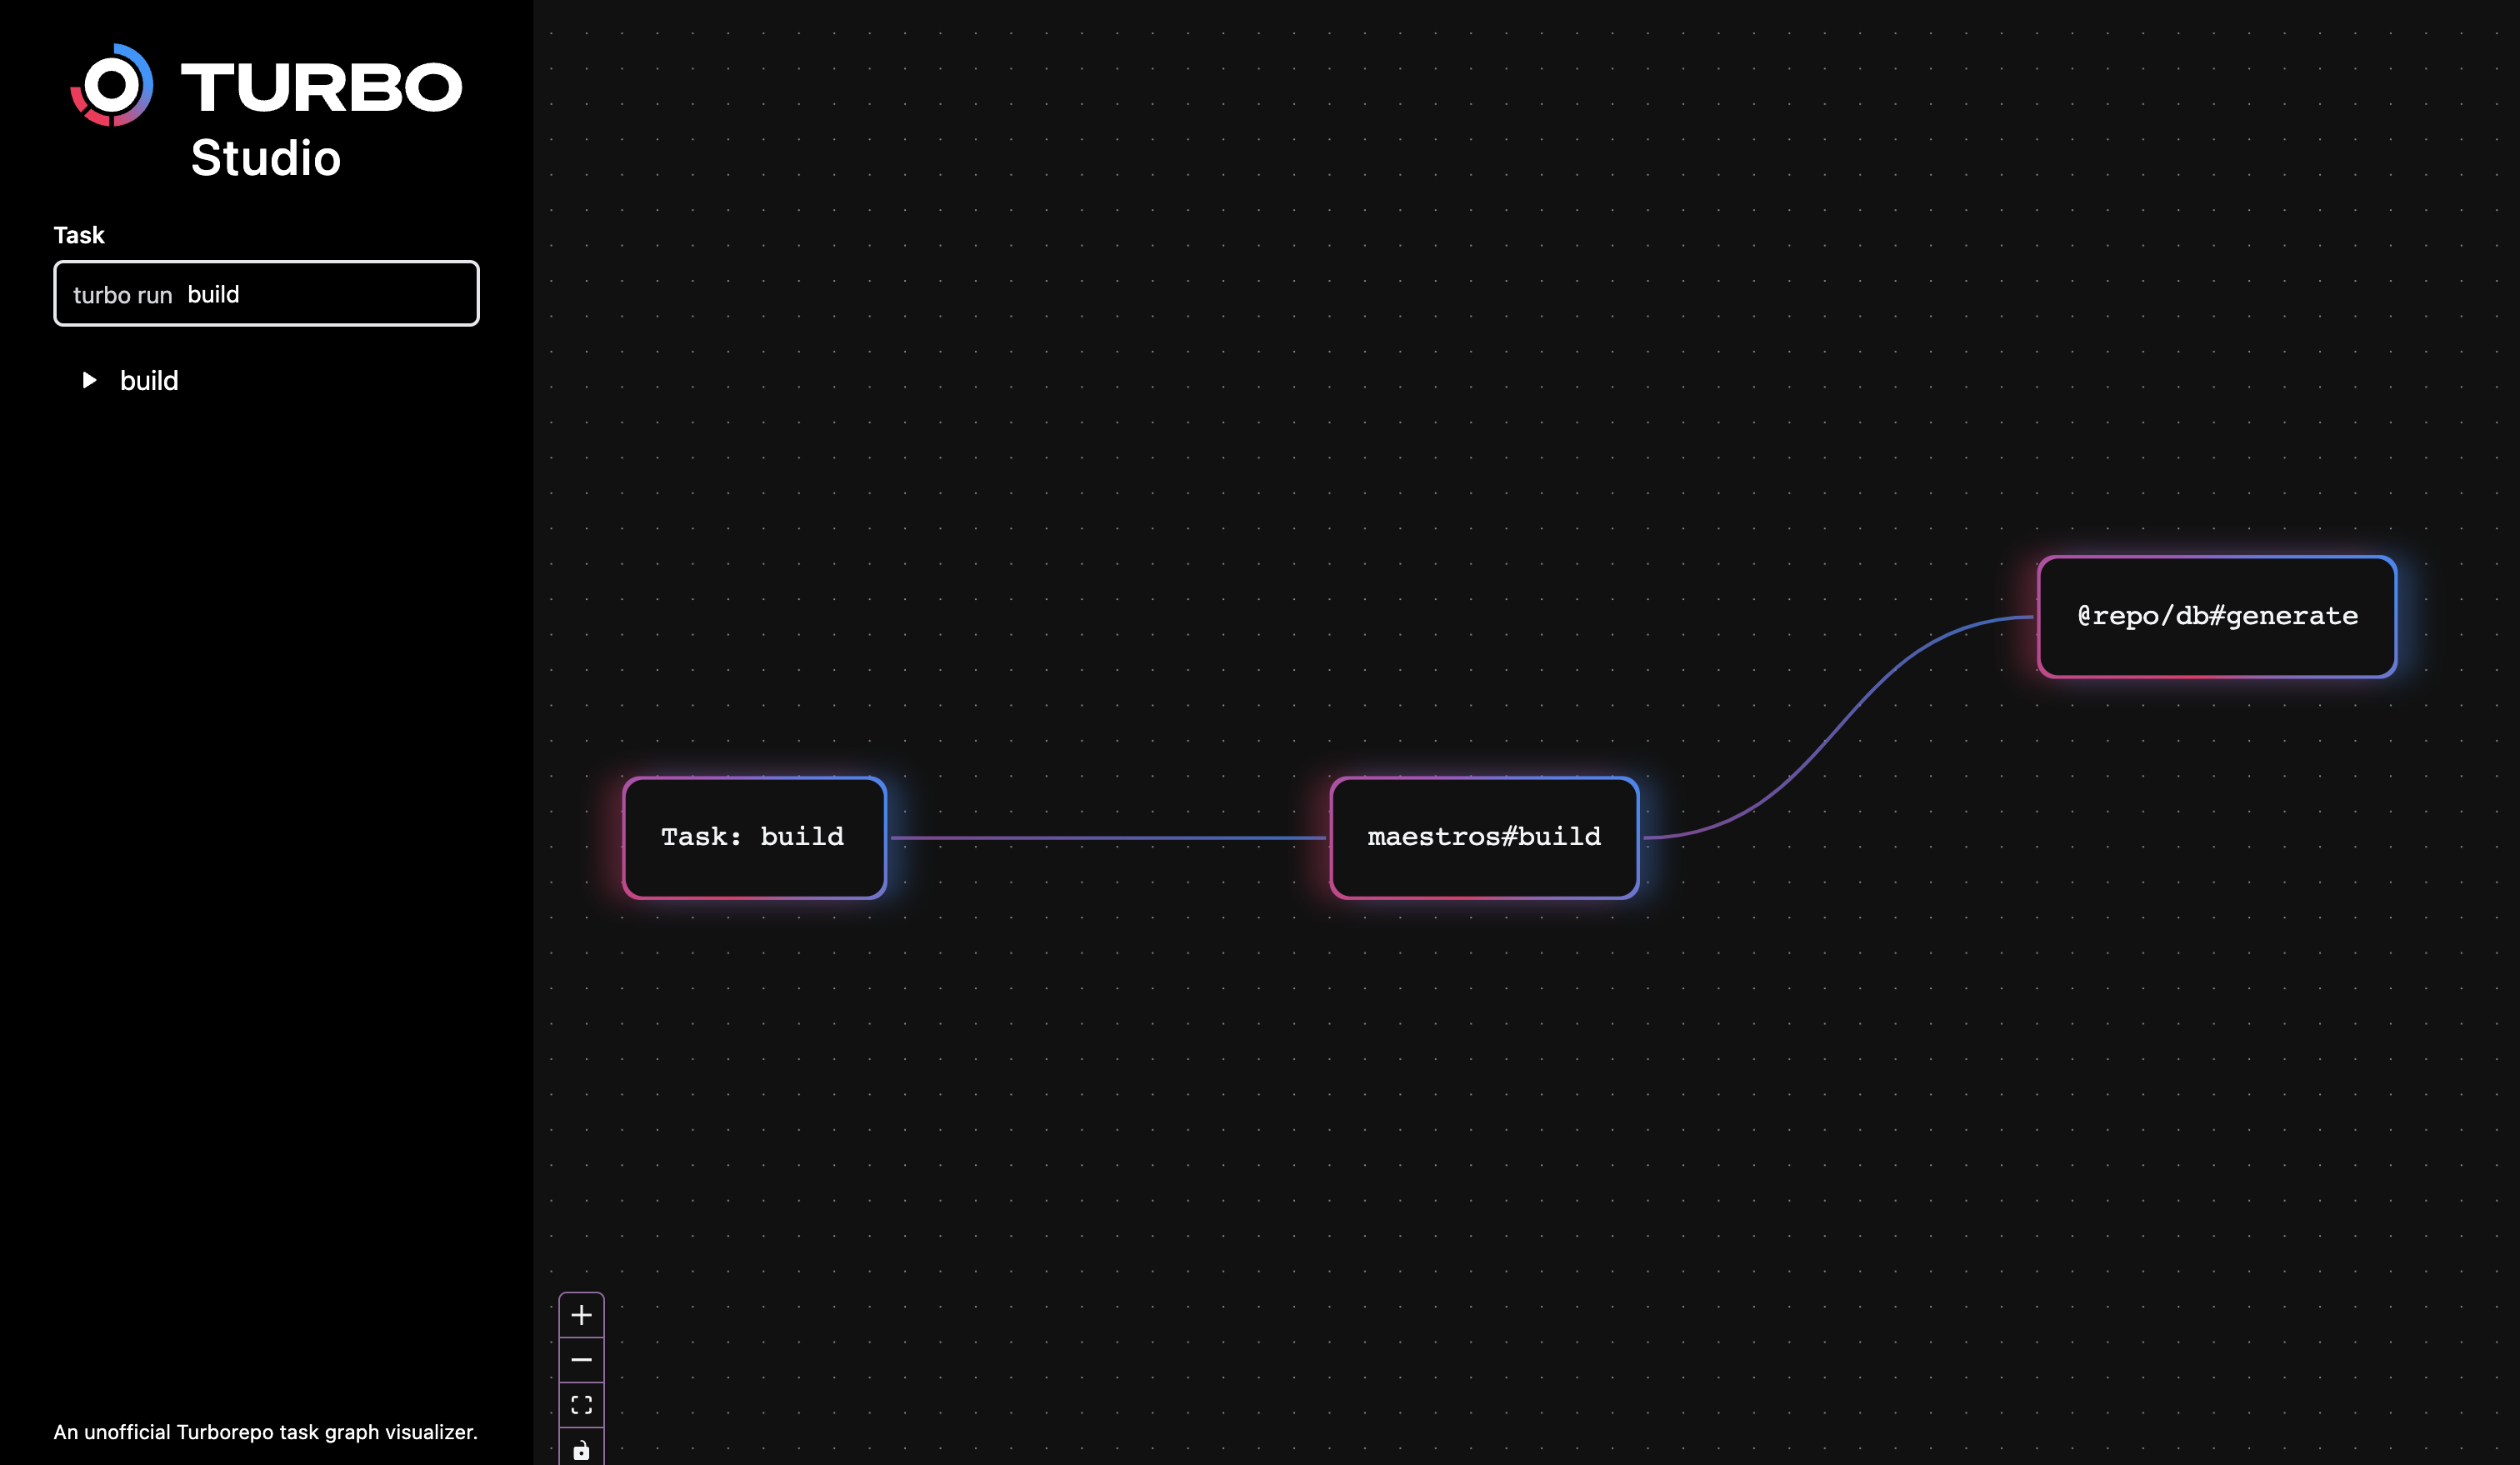
This graph shows the steps that it takes to build Maestros:
- You or your CI run the
turbo buildpipeline. turbofinds themaestrosapp has abuildtask.turbosees that thebuildtask for themaestrosworkspace depends on thegeneratetask in the@repo/dbworkspace. This dependency can be found in the root'sturbo.json.
This is a simple pipeline with few steps. In the left sidebar, you can change the task to turbo run lint or turbo run typecheck see graphs with slightly more complexity. You can also edit turbo.json or workspace dependencies to see what changes you can bring to your task graph.
Using this visualization in your own repository
You can copy the "Turbo Studio" workspace into your project using Turborepo Generators.
Visit your browser and start inspecting your repository's graphs!
As a repo maintainer
If you're one of the folks entrusted with keeping the monorepo running smoothly, you'll want to keep your graph in mind as you work with the monorepo for a few reasons.
- Making changes deep in your graph will affect the tasks that depend on that workspace. While you do want this to happen, you may want to consider if this will create an extra long build time that would slow up the pace of deployment for your developers. (This concern only seriously reveals itself at scale, where deployments can take considerable time to make it to production, even with Remote Caching enabled.)
- The "A" in DAG stands for "acylic", meaning that you can't have Dependency A depend on Dependency B and Dependency B depending on Dependency A. If you create a cycle in your graph,
turbowill throw an error because of this. You'll want to refactor your workspaces to alleviate this circle of dependencies. - A monorepo is a great way to encourage communication and collaboration on your company's products. As a keeper of the repository, your leadership on communication is vital to the success of all of the developers working within the repository. You can set a strong example of togetherness by working closely with the individuals and teams that work in the repo for everyone's benefit.
As an application developer
It's important to understand the characteristics of your graph as an application developer, as well.
- Knowing the shared code that is available to you in your repository can save you considerable time when working on a feature. If your repository maintainers have, for example, created a shared error handling library for the whole company to use, you can import those functions and methods rather than having to create your own new error handlers.
- Making changes in a workspace that is deep in the repo's graph could create a longer build time than you're expecting. Additionally, the workspace may also be a dependency in other applications, starting a build process for those applications, too. When you change shared code, your goal should be to overcommunicate those changes with anyone who may be affected in your engineering organization so everyone can stay on the same page.